Continuing our "What's Expected" series, it's now time to take a look at what makes for a successful student director of photography, or DP.
1. Develop a Visual Vocabulary for the Film. As the Director of Photography, your primary responsibility is to assist the Director in interpreting his or her vision of the story on the page into compelling images on the screen. That means thoroughly reading the script and spending time with the Director discussing non-visual things like theme, character arcs, mood, and emotional beats, as well as visual elements like camera movement, color, light, and shadow. Firm understanding of those non-visual elements buried inside the text will enable you to effectively communicate those deeper elements to the audience through your lighting, lens choices, camera moves, and overall visual style. And that understanding will also enable you to quickly improvise, make changes to your plan, or simplify your methodology on set without compromising the artistic integrity of the film.
2. Lead by Example. You're the "Captain of the Crew" in that the Camera, Grip, and Electrical Departments all report directly to you. They will look to you for direction and approval for everything they do on set. But more importantly, your behavior shapes theirs. A DP who is chronically late to set will train their crew to not have any urgency to get going in the morning. A DP who leaves set while the rest of the crew is cleaning and packing gear will show the crew that their work isn't respected. And a DP who publicly battles with the Director or even goes so far as to direct actors diminishes the Director in the eyes of the crew.
3. Manage Your Equipment. As far as camera, grip, and electric equipment goes, it's your responsibility to reserve it as soon as a shoot is scheduled, check it out of the Library the night before the shoot, inspect it thoroughly, charge all batteries, clean all lenses, confirm that bulbs light up, make sure monitors have all their cables, etc. While your crew will be responsible for much of this on set, you do yourself and your team no favors if you haven't inspected everything beforehand. What's more, you don't know who might have checked out your gear before you or how they may have left it. Don't assume that a camera is set to the right ISO, white balance, or frame rate. Be sure. Check it. Dial in your settings the night before so your AC can literally set up the camera without you in the morning while you go over the day's shot list with the Director.
4. Brush up on Your Fundamentals. In the heat of production, you're going to be expected to execute the plan and solve any problems that come up, quickly and efficiently. To do that you need a strong grasp of all the fundamentals of cameras, lenses, depth of field, lighting, and grip equipment. Review terminology, techniques, and important steps from classes like DVA241 and Cinematography. Knowing the difference between "move the lamp left" and "pan the lamp left," remembering the names of the three positions of an apple box, and grasping the key visual differences of all the lenses in your kit will make you a more effective and more efficient DP.
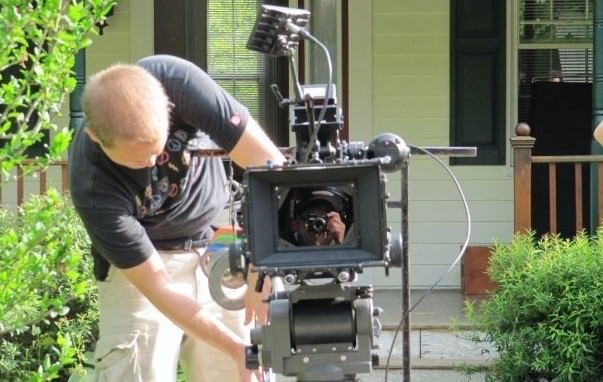
5. Delegate. It's very tempting to just try to do everything yourself, especially on the first day with a new crew. But resist the urge to change your own lenses, move your own lights, or even pull your own focus. Your crew is there to make your job easier, not stand around and watch you do theirs. Trust them and empower them to do their best work in support of your vision of the film. Your AC is there to manage your camera rig, change your lenses and batteries and memory cards, put down marks for the actors, take focus measurements, pull focus for you, and keep the camera log. Your Key Grip is there to manage your grip equipment and your grip crew. Likewise your Gaffer is there to manage the lights and the electrical crew. Delegate jobs to the right person and let them do their thing, but be ready to give guidance and approval as soon as they are needed.
6. Nail Your Focus. It may be your AC's job to pull focus, but it's your responsibility to make sure it's right. Our newer, large-sensor cameras give us beautifully shallow depth of field but also make nailing critical focus more difficult than ever. Work with your AC to set marks, take measurements, and use all our monitoring tools to check focus again and again to be sure it's sharp. Consider the aperture of your lens. Do you need to shoot so wide open that your depth of field is so shallow that if an actor breathes, he's out of focus? Probably not. Should you be shooting so closed-down that almost everything in your shot is in focus? Again, probably not. Check those settings, make your marks, and make sure it's sharp before you roll camera.
7. Shoot with VFX in Mind. Visual Effects are part and parcel of what we do here at UAT. You're going to need to light greenscreens, pay attention to tracking markers, and add interactive lighting for effects that should be emitting light into the scene. You may have to compose shots for elements that aren't there and won't exist for months. You may have to shoot actors separately with the intent of having them composited together by the VFX team. All of this requires you to have at least a basic handle on visual effects work and the ability to previsualize the final outcome of a shot so you can provide the VFX team with the raw materials they need to make it happen.
8. Watch Dailies. Watch your footage while the film is still in production. Don't wait til the end. You should be watching footage every day, hence the name "dailies." That means you're probably staying later than the rest of the crew, or you're taking footage home with you, or you're arriving an hour before everyone else in the morning. Whatever you have to do, do it. Because you can't improve upon yesterday's performance unless you see the footage with your own eyes and assess what you could have done better.
9. Manage Color. Shoot with the flattest dynamic range possible. Adjust the picture settings on your camera to give you the most information in the highlights and the shadows so you can dial in your final look in post. Then make sure you manage the color grading process or even better still, grade the film yourself. The color grade can dramatically change the look of a film, just make sure you aren't handing the responsibility for that off to someone else. Ultimately the image still belongs to you as DP, and you need to be satisfied with the final product.
10. Develop Your Own Style. Finally, start to develop your own signature. You can always tell a Gordon Willis film from a Wally Pfister film from a Roger Deakins film. Figure out what makes a film uniquely yours, the type of shots you want to be known for, or the type of lighting that feels like your signature. Put some of yourself as an artist into everything you shoot, no matter who is directing, no matter what the genre. But make sure it serves the story and isn't just "cool for cool's sake." A bad DP lets his or her personal style overwhelm the substance of a film. A good DP serves the story first and foremost. But the great DPs know how to serve a story while also expressing their personal style in harmony with the rest of the film.

Showing posts with label cinematography. Show all posts
Showing posts with label cinematography. Show all posts
Wednesday, April 3, 2013

Tuesday, June 19, 2012
HurlBlog: 'Diffusion for the Digital Age – Using Smoke'

The first diffusion I go to time and time again, whether it is film or HD, is smoke. This is a very powerful tool. Having the patience to use the right smoke to get your levels consistent can infuse a mood, transport you back in time, create style, and a cream effect on a woman’s skin. One tool.
Check out more examples, and the full blog post over on HurlBlog.
Wednesday, June 13, 2012
nofilmschool: 'Two Interview Lighting Tutorials That'll Kick Your Footage Up a Notch'
The great "nofilmschool" blog turned us on to these two awesome lighting tutorials. If you're new to lighting, or just looking for some pointers to sharpen your skills and fill out your aesthetic toolset, these are both worth a watch. From the nofilmschool article:
The first tutorial comes courtesy of stillmotion, the folks behind SMAPP (which looks like a pretty useful filmmaking app for folks learning the ropes). Not only does this tutorial do a great job of illustrating a general lighting set-up, it does so while jam-packing key terms and concepts. It’s a solid introduction to lighting in general — from key lights to fill lights, to lighting ratios, you get a lot of great information:
The second tutorial is from Eve Hazelton and the folks at Realm Pictures (who are developing what looks like a really cool underwater fantasy project). What I like about this tutorial in particular is how it shows the many ways you can spice up the image with well placed lights in the background, and that 3-point lighting isn’t some hard and fast rule — you light to your tastes:
Tuesday, May 29, 2012
Filmmaker Magazine: 'Ten Tips on Shooting Low-Budget Movies from SXSW'

Tuesday, March 13, 2012
Evan Richards: 'Reverse Key Lighting'

The idea is that the key light is placed behind the subject rather than in front (the way you would probably see it set up in most cinematography books).Read the rest of the article, which includes images from numerous blockbusters such as True Grit (above), here: http://evanerichards.com/2012/2463
Wednesday, February 22, 2012
Greenscreen Lighting Techniques Tutorial from Eve Hazelton
You can check out Eve's previous lighting tutorials here and here.
Thursday, December 1, 2011
Pixiq: 'Everything About Camera Lenses'

Friday, November 18, 2011
Exposure Guide: 'Focusing Basics'

Wednesday, November 9, 2011
ICG Magazine: 'Raging Bulls' Examines the DP-to-VFX Workflow on 'Real Steel'

Bringing in a VFX-heavy feature for $80 million is no mean feat, and Josh McLaglen, a veteran of the some of the most complex logistical films in recent memory, points to the unique workflow as a big part of that process. “If you’ve got two ordinary people talking over coffee or even fighting each other for most of your movie, our production paradigm is unnecessary,” he concludes. “But if two of the four main characters are paranormal, it makes really good sense, and is a cost-effective methodology for budgeting complex films. Avatar was translated virtual-to-virtual, only rarely with humans being interactive. But this one is going virtual-to-live-action in the real world. To accomplish that, I think we used the tools better this time.”Read the entire article here. Also of note is this fxguide "Case Study" on Real Steel and the accompanying fxpodcast.
Sunday, September 25, 2011
The Black and Blue: 'How to Read the DP’s Mind & Stay One Step Ahead'
You can do your best to anticipate and predict what the DP wants and, when you’re right, it will seem like you read their mind. They’ll be both amazed and pleased that somehow you managed to get everything exactly how they wanted, all without even telling you.Read the whole article here, and subscribe to The Black and Blue right away!
Wednesday, September 21, 2011
Vincent Laforet and Vimeo go 'Behind the Glass'

Monday, August 29, 2011
The Visual Language of RAGING BULL

This is not intended to be a comprehensive look at the language of the film, as there is a lot there to unwrap. Rather we will limit our discussion to a few select elements. We will look at how Scorsese uses shot composition, lens choice, and, surface division to enhance the tone and mood of the film.Read the whole article on FreshDV's website.
Thursday, August 11, 2011
CAPTAIN AMERICA Action Shots Captured with Canon 5D Mark II DSLRs

Canon U.S.A. has announced that the highly anticipated feature film, Captain America: The First Avenger, used Canon EOS 5D Mark II Digital SLR cameras to capture many of the movie’s action shots. Throughout the super hero action picture, the 5D Mark II was used to shoot motion sequences that were seamlessly integrated with the production’s 35mm film footage.Read the full article here.
Monday, August 8, 2011
The best ISO settings for your Canon DSLR
DP / filmmaker Andrew Schar recently posted this informative video comparing the noise inherent to various ISO settings on Canon DSLR's in movie mode. I for one will be sticking with multiples of ISO 160 from now on!
Friday, June 10, 2011
Adjunct Professor Pickersgill Wins 2011 Telly Award!
UAT Digital Cinematography Professor Webb Pickersgill and his team of UAT students Bryan Simcox, Wes Peterson, and Sean Walter picked up a 2011 Telly Award for their work on the book trailer for Devious by Lisa Jackson. Congratulations to all involved!
Check it out on YouTube or watch the embedded video below.
Check it out on YouTube or watch the embedded video below.
Tuesday, June 7, 2011
IFP/Phoenix Offers Hands-On DSLR Filmmaking Workshop June 25th

Time: 12:00pm-4:30pm
Where: IFP/PHX Classroom
1700 North 7th Avenue #250
Phoenix, AZ 85007
So... you're telling me that a little DSLR camera, one that normally takes photographs, can be used to shoot my next independent film? YES!
In this 4-hour hands-on workshop, we'll show you the key things you need to know to be able to shoot your next film on a DSLR camera!
We will have 3 cameras on-hand for you to get your hands-on. Canon 7D, Canon 60D, Canon T2i. If you have your own DSLR, bring it along and we'll show you the ropes!
Topics that will be covered:
- Overview of the body, operation, and menus
- Camera "rigs", rails, follow focus, matte box, monitors
- Getting proper exposure
- Selecting and configuring custom presets
- Controlling your depth of field
- Reducing rolling shutter effects
- Recording audio for your film
- Shooting some test footage!
- Post production workflow
- Color correction for optimal results
*Tickets: $30 IFP/PHX members (use code IFPPHX - subject to verification); $50 non-members
*Indicates pre-purchase price, add $5 for walk-ins (if available)
Purchase Tickets at:
http://www.brownpapertickets.com/event/179644
Tuesday, March 1, 2011
HDDSLR Workshops with Gale Tattersall
HDDSLR Workshops with Gale Tattersall on Vimeo.
More information about Gale Tattersall's workshops can be found here.Sunday, February 27, 2011
What’s the Difference Between the ARRI ALEXA and RED Cameras? One Humorous Explanation
Another great find over on nofilmschool.com:
Sensible Digital Cinema: The Arri Alexa from Inspiration Studios on Vimeo.
The ARRI ALEXA and RED EPIC (and RED ONE M-X) are cameras that we’ll be seeing hundreds of features shot on over the next several years. What’s the difference between the two? Check out this amusing video from Inspiration Studios, whose comparison of the ALEXA and RED cameras includes a none-too-subtle suggestion about the fading utility of their DSLR rental package:
Sensible Digital Cinema: The Arri Alexa from Inspiration Studios on Vimeo.
Saturday, February 26, 2011
Drive in a Car Without Driving in a Car!
This cool tutorial video comes from the guys at FilmRiot. Think about these tips next time you plan a driving scene.
Friday, February 25, 2011
Using Stills to Create Matte Painting Effects in Your Footage
Here's a cool technique, using the still-photography function of your HDSLR to gather more information and more latitude than the HD video function alone can capture. This "tutorial" is a little dry, but stick with it. This technique opens up LOTS of possibilities!
How to use stills to create simple matte painting effects for your DSLR footage from Robino Films on Vimeo.
Subscribe to:
Posts (Atom)